
How to use InstaCropper.
Turn a scanned sheet of Polaroid or Instax prints into individual photos. Review and edit each photo, make several versions with different frames, and save the whole project to keep working later. Start here for the full workflow; see Frames & shadows for detailed paper and background settings.
Screenshots show the app’s controls. Select an image to view it larger.
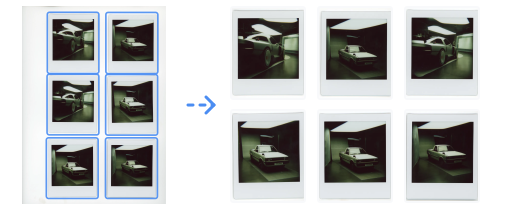
Prepare your Polaroid or Instax scan
- Leave visible space between prints. Touching or overlapping photos can be detected as one region.
- Keep each print flat and include its entire edge in the scan. Use a plain background that makes the edges easy to distinguish.
- Choose a scan resolution that captures the detail you need. A larger scan contains more pixels and uses more memory; cropping cannot recreate detail the scanner did not capture.
- Keep the original scan as a backup. Avoid trimming it tightly before importing, so you have room to adjust individual crops.
Separate, review and edit
- Add the scanned image.
Drop it into InstaCropper or choose browse files. You can add several scans to the same project. To see the workflow first, select a sample scan and choose Load selected.
- Let detection finish, then review the results.
Compare the detected photos with the original sheet. Check that every print is present, faces and edges are intact, and no pair of photos has been combined.
- Correct the crops where needed.
Use Review scan to check the source, Refine crop to adjust a boundary, or Instant crop when two prints were combined. Low contrast, glare, overlap and strong shadows can require manual review.
- Open a photo to edit it.
Click its thumbnail to open Preview. Use Adjust for photo adjustments such as brightness and white balance, and Frames for the appearance of the output. Review rotation and crop boundaries before adding text or drawings.
- Check which edits are shared.
If a photo has several outputs, changing its crop, rotation, brightness, white balance, text or drawings updates all of that photo’s versions. Each version keeps its own frame settings. Changes to one photo do not change the pixels of another photo.
When the project already contains photos, use Add scan in the toolbar or drag another scan onto the main workspace. The large upload area belongs to an empty project. You can switch between Contact sheet, Grid and Grouped layouts without creating another copy of a photo.
White balance: the sidebar’s Auto white balance applies across the project and uses the paper as its reference. At 0%, it keeps the original scan color. Preview’s Adjust panel lets you choose a value for one photo; its outputs share that value. Changing the sidebar value again replaces those individual choices.
Make several outputs from one photo
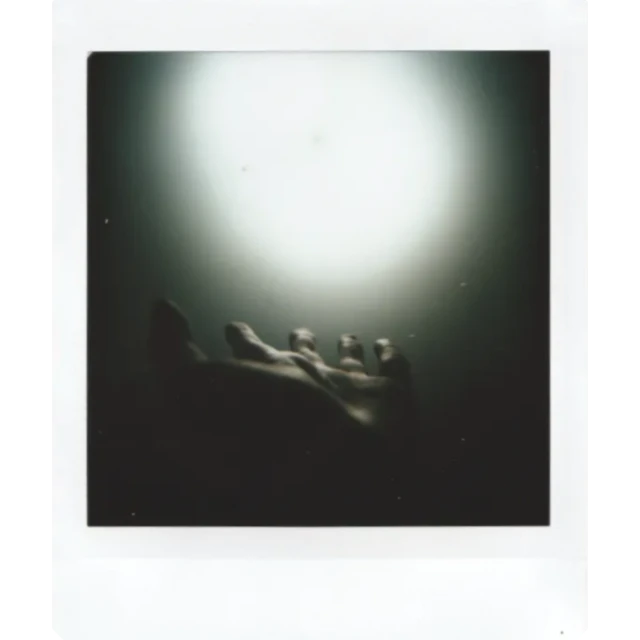
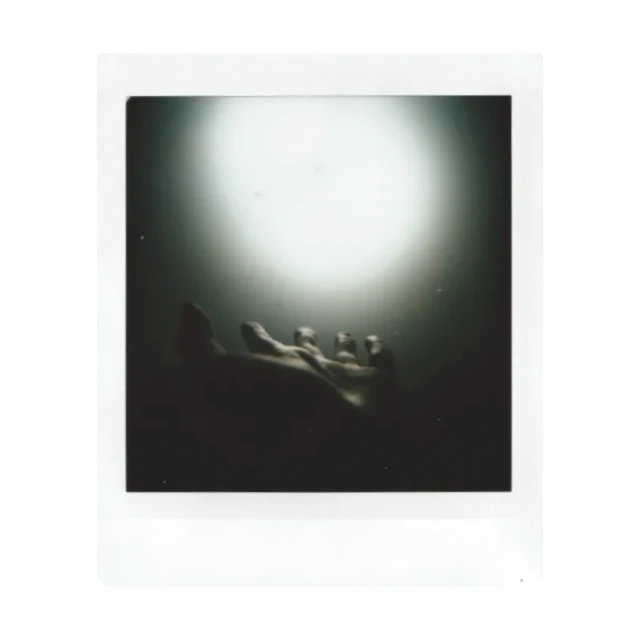
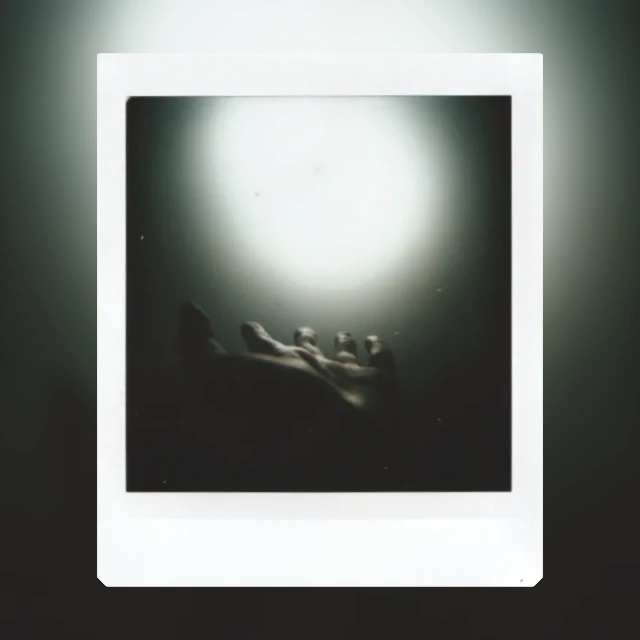
An output is a version of an existing photo for download. For example, keep one version with no added background, another on a square white frame, and another on a blurred photo background. You do not need to import or crop the scan again.
- Select the photo or photos on the main page.
For a single photo, select just that photo. For several, select their photo groups. The photo/group checkbox chooses photos for batch actions; the small checkbox on an output tile chooses whether that version is downloaded.
- Open Sidebar → Shared outputs → Add output.
On a narrow screen, open the sidebar first. The popup is where you create versions. Preview’s Frames panel edits the version you opened.
- Choose Apply to.
Selected photos adds one output to every selected photo, including when only one is selected. All photos adds one to each photo in the project. Selected photos is the default when there is a selection; otherwise the popup offers All photos.
- Choose an Output style, then Add output.
No added frame uses the existing crop without an extra background. White frame adds a white background. Photo background uses the inner picture as its background. Existing outputs stay in place. Repeat these steps whenever you want another version.
- Open the new version and customize Frames.
Choose a ratio such as 1:1, 4:5 or 1.91:1, or enter a custom W:H ratio. Then adjust the background, margin, blur and shadow. Versions appear as normal, equally sized photo tiles together under the same photo name on the main page.
| Setting | What it affects |
|---|---|
| Crop, rotation, brightness, white balance, text and drawings | Every output of that photo. You can still edit the photo after adding versions. |
| Frame ratio, White/Photo background, margin, background blur and Drop shadow | The output opened in Preview → Frames. Sidebar frame controls apply across the project. |
| Download format, quality and output checkbox | The individual output, with sidebar defaults used when it has no individual format or quality choice. |
Example: add a white square output to one photo, then add a photo-background output to the same photo. Increase brightness in Adjust once; both versions update. Increase the square version’s margin in Frames; the other version keeps its own margin.
To discard a version, use its tile’s Remove output × button. At least one output stays for each photo. If you just want to omit a version from a download, uncheck that output instead of removing it.
Photo background is available with None or Drop shadow. Natural shadow keeps the captured scan edge and supports White or Transparent. Choose Background → Transparent in Preview → Frames or the sidebar to leave clear space around the photo while keeping its ratio, margin and paper border. Use PNG or WebP to preserve transparency; JPG and TIFF use white. Each output can save a different background. For the full frame and shadow controls, see the frame guide and Drop shadow examples.
Choose the versions to download
Check the outputs you want on the main page. You can keep a version in your project without downloading it: leave its output checkbox unchecked. Review each look at a useful zoom before exporting.
| Choice | Use it for |
|---|---|
| Download as ZIP | One archive containing checked outputs. Versions of the same photo stay in one folder, so their relationship is clear. |
| Download individually | Separate image files for checked outputs. Your browser may request permission for multiple downloads. |
| Download as contact sheet | A visual overview of checked outputs on one sheet. |
| Preview → Download | Download the version currently open. Choose its format and, for JPG or WebP, its quality. |
While a ZIP is building, the bottom notification shows progress and an estimated time remaining. Use Cancel there to stop the export. Any photo operation already in progress finishes first; your photos, edits and output versions stay in the project, and you can download again. Large archives use ZIP64 automatically when needed to keep the outputs in one ZIP.
Format and quality
JPG is useful for compact photographic files but does not preserve transparent areas. PNG keeps lossless pixels and transparency. WebP can provide compact files with transparency. TIFF is available when your workflow needs it. Quality controls JPG/WebP compression; it does not increase the detail captured by the scan.
The sidebar provides the project’s default format and quality. Preview’s Download panel can set a format and JPG/WebP quality for the opened output. This lets you keep, for example, a PNG print and a smaller JPG background version in the same project.
Save and reopen an editable project
An image download is a finished output. An .inst file is the editable project: it keeps the source scans, photos, shared crop and color edits, text and drawing layers, output groups, the active version, checked outputs, and each version’s frame, shadow, format and quality settings. Hidden or locked drawing layers are retained too.
The bottom status separates Saved in browser from your portable file. Download .inst backup exports a project file; after more edits, it changes to Update .inst backup. Browser autosave updates Recent, and does not rewrite a previously downloaded file. The export status is retained when you reopen from Recent.
Use the curved Undo / Redo arrows on the main page to reverse sidebar frame, margin, background, shadow, white balance and output settings. A slider drag is one step. Pending scan settings can also be reversed before reprocessing. The buttons remain visible on small screens. Ctrl/Cmd+Z undoes a setting; Ctrl/Cmd+Shift+Z redoes it. Focused text and number fields keep their own editing shortcuts. Preview keeps its separate photo-edit history; reopening a project begins a new history.
- Use Save to download an .inst project.
Let edits and output creation finish, then save. Keep this file alongside the original scans if the project matters to you.
- Open Saved projects to continue in this browser.
Recent projects are autosaved locally on the current device and browser. To reopen a downloaded .inst, use Import .inst file… in Saved projects, or File → Open….
- Save a fresh .inst after making more changes.
Browser autosave updates Recent. It does not rewrite a project file you already downloaded. Reopening keeps the saved edits and original reset pixels, but begins a new undo history.
Browser cleanup can remove Recent projects, and another browser or device has its own storage. A downloaded .inst is your portable copy; keep the original scans as a separate source backup.
Common questions
Can I change crop or brightness after adding outputs?
Yes. These are shared photo edits: every version of that photo updates. Frames, background, margin and shadow remain specific to each version when edited in Preview.
Does Add output replace my current photo?
No. It adds another version and keeps existing outputs. Select one photo to add a version only to that photo, or use All photos to add one to each. You can repeat the action to create more looks.
Why are there two kinds of checkbox?
The photo/group checkbox chooses which photos receive a batch action. An output tile’s checkbox chooses whether that version is included in downloads. Selecting a group is not the same as enabling every version for download.
Why is Photo background unavailable?
Natural shadow preserves the captured scan edge and uses White or Transparent. Change that photo’s Shadow to None or Drop to use Photo background. The Add output popup explains this when any target photo uses Natural.
Does No added frame remove the print’s white paper border?
No. It means no extra background is added behind the cropped print. To crop down to the inner picture, turn off Keep Polaroid border. That changes the underlying photo and therefore all of its outputs.
Can I split a scan without uploading my photos?
Normal scanning, cropping and exporting run locally in the browser. If you choose to send a bug report with a photo preview, that optional attachment is sent with the report.
Why did it miss a photo or combine two prints?
Detection depends on visible edges. Closely spaced prints, a similar-colored background, glare and overlapping edges can make separation harder. Review the scan and adjust or split crops before exporting.
Which photos does InstaCropper support?
Automatic detection is designed for Polaroid and Instax instant-film photos, including Instax Mini, Square and Wide. Standard photo prints are not a supported detection format. Keep the full paper edge in the scan; the Polaroid and Instax scanning guide explains how to prepare these photos and check their borders.
Give every photo its own file.
Open your scan, review the crops, and download the results.